If you’ve ever dreamed of having a lush garden filled with beautiful and delicious globe artichokes, then look no further! With our handy guide on “How To Grow Globe Artichoke,” you’ll learn everything you need to know to successfully cultivate your own artichokes. From choosing the perfect location to planting and caring for your plants, we’ve got you covered. Get ready to experience the joy of growing your own mouthwatering globe artichokes right in your backyard!
Choosing a Location for Growing Globe Artichoke
When selecting a location to grow globe artichokes, it is crucial to consider their sunlight requirements, soil conditions, and climate considerations.
Sunlight Requirements
Globe artichokes thrive in full sun, so it is essential to choose a location that receives at least six to eight hours of direct sunlight daily. Without adequate sunlight, the plants may not develop properly, and the artichoke buds may not form.
Soil Conditions
The soil conditions play a significant role in the successful growth of globe artichokes. The ideal soil should be well-draining, fertile, and have a pH level between 6.5 and 7.5. It is advisable to perform a soil test to determine the soil’s nutrient content and pH level.
Climate Considerations
Globe artichokes are perennial plants that are suitable for Mediterranean-like climates. They thrive in regions with mild winters and moderate to cool summers. While they can tolerate frost, extreme or prolonged cold temperatures can damage the plants. Therefore, it is important to consider the climate of your region before deciding to grow globe artichokes.
Preparing the Soil
Preparing the soil before planting is vital for the long-term health and productivity of globe artichoke plants. This process involves soil testing, amending the soil, and tilling the soil.
Soil Testing
Before planting globe artichokes, it is highly recommended to conduct a soil test. Soil testing provides valuable information about the nutrient levels and pH of the soil. Based on the test results, you can make informed decisions about the type and amount of soil amendments needed.
Amending the Soil
If the soil test reveals deficiencies in nutrients or pH imbalance, it is necessary to amend the soil accordingly. Organic matter, such as compost or well-rotted manure, can be added to improve soil structure, fertility, and moisture retention. Adjusting the pH level can be done by adding lime to raise it or sulfur to lower it.
Tilling the Soil
Tilling the soil helps to break up compacted soil, remove weeds, and incorporate amendments. It is recommended to till the soil to a depth of 12 to 18 inches to ensure proper root development for globe artichoke plants. Be cautious not to over-till, as it can disrupt the soil structure and beneficial organisms.
Starting Globe Artichoke from Seeds
Growing globe artichokes from seeds can be a rewarding and cost-effective method. This process involves germinating the seeds, sowing them, and transplanting the seedlings.
Germinating the Seeds
To improve germination rates, it is recommended to soak the globe artichoke seeds in warm water for 24 to 48 hours before planting. Sow the seeds in seed-starting trays filled with moist seed starting mix. Cover the seeds with a thin layer of soil and provide consistent moisture and warmth for optimal germination.
Sowing the Seeds
Once the seeds have germinated and developed into young seedlings with two to three sets of true leaves, they can be transplanted into individual pots or containers. Ensure the containers have good drainage and provide sufficient space for root growth. Continue to provide adequate moisture and sunlight to promote healthy growth.
Transplanting Seedlings
When the seedlings have grown to around 4-6 inches in height and all danger of frost has passed, they can be transplanted into their permanent outdoor location. Before transplantation, harden off the seedlings by gradually exposing them to outdoor conditions over the course of a week. Choose a location that matches the sunlight, soil, and climate requirements discussed earlier.
Propagating Globe Artichoke from Suckers
Another method of growing globe artichokes is through propagating suckers. Suckers are the shoots or offshoots that emerge from the base of established plants. This process involves identifying suitable suckers, preparing them for planting, and transplanting them.
Identifying Suitable Suckers
Select suckers that are healthy, disease-free, and have their own root system. They should be approximately 6-8 inches in height and have multiple sets of leaves. Avoid selecting suckers that are too young or weak, as they may not establish well.
Preparing Suckers for Planting
Before transplanting the suckers, trim the leaves to around 6-8 inches in length to reduce water loss through transpiration. Remove any damaged or diseased leaves. Additionally, inspect the roots and remove any damaged or rotten parts. This step ensures vigorous growth and minimizes the risk of transplant shock.
Transplanting Suckers
Dig a hole in the soil that is wide and deep enough to accommodate the root system of the sucker. Place the sucker in the hole and gently backfill with soil, ensuring that the crown remains exposed above the soil surface. Firmly press the soil around the base of the plant to eliminate air pockets. Water the newly transplanted suckers thoroughly to encourage root establishment.
Planting Globe Artichoke
Once you have prepared the soil and selected the appropriate propagation method, it is time to plant the globe artichoke. Consider the right time to plant, determine the spacing between the plants, and choose the appropriate planting method.
Choosing the Right Time
Globe artichokes can be planted in early spring or early autumn. Spring plantings allow the plants to establish themselves before the heat of summer, while autumn plantings give the plants a head start for the following growing season. Timing the planting correctly ensures better chances of success and allows the plants to adapt to the climatic conditions.
Spacing the Plants
Provide adequate space between globe artichoke plants to allow them enough room to grow and spread. Maintain a spacing of around 3-4 feet between each plant. This spacing ensures that the plants receive sufficient sunlight, nutrients, and air circulation, reducing the risk of diseases and encouraging healthy growth.
Planting Method
To plant globe artichokes, dig a hole that is wide and deep enough to accommodate the root system of the plant. Place the plant in the hole, ensuring that the crown sits just above the soil surface. Backfill the hole with soil, gently firming it around the plant. Water the plant thoroughly after planting to settle the soil and initiate root growth.
Watering Globe Artichoke
Proper watering is essential for the growth and development of globe artichoke plants. By establishing a watering schedule, utilizing appropriate irrigation methods, and avoiding overwatering, you can ensure the plants receive the right amount of moisture.
Establishing Watering Schedule
Globe artichokes require regular moisture, especially during the first few months of growth. Water deeply once a week, ensuring that the soil is evenly moist around the roots. As the plants mature, they become more drought-tolerant but still benefit from consistent moisture.
Irrigation Methods
Consider using a drip or soaker hose irrigation system for globe artichokes. These methods deliver water directly to the root zone while minimizing evaporation and reducing the risk of foliar diseases. Avoid overhead watering, as wet foliage can lead to fungal diseases.
Avoiding Overwatering
While globe artichokes need consistent moisture, it is crucial to avoid overwatering, which can lead to root rot and other fungal diseases. Allow the top few inches of soil to dry out between watering to prevent waterlogged conditions. Adjust the frequency and duration of watering based on the weather conditions and the moisture retention capabilities of your soil.

Support and Staking
Support and staking are essential for globe artichoke plants, as their tall stalks and large leaves can be susceptible to breaking or leaning. By selecting appropriate supports, staking the plants securely, and tying the stalks carefully, you can provide the necessary support for the plants.
Selecting Supports
Choose sturdy supports that can withstand the weight of the artichoke plants. Bamboo stakes, metal stakes, or trellises can be used. Ensure the supports are tall enough to accommodate the height of the plants and provide stability against wind or heavy rain.
Staking the Plants
As the globe artichoke plants grow, monitor their height and development. When the plants reach around 2-3 feet in height, drive the stakes into the ground around the plants, ensuring they are securely anchored. Position the stakes around the circumference of the plant to evenly distribute the weight and provide support from all directions.
Tying the Stalks
Gently tie the stalks of the globe artichoke plants to the stakes using soft garden twine or plant ties. Avoid tying too tightly, as it can restrict the growth and cause damage to the stalks. Tying the stalks loosely allows for movement while providing the necessary support to prevent breakage.
Fertilizing Globe Artichoke
To promote healthy growth and abundant yields, globe artichokes require proper fertilization. Understanding their nutritional needs, applying fertilizer at the right times, and considering organic fertilizer options can optimize their growth and vitality.
Understanding Nutritional Needs
Globe artichokes are heavy feeders that require a nutrient-rich soil. They benefit from a well-balanced fertilizer that includes nitrogen, phosphorus, and potassium. Nitrogen promotes leaf and stalk growth, phosphorus stimulates root development and flowering, while potassium enhances overall plant health and disease resistance.
Applying Fertilizer
Before planting, incorporate a slow-release fertilizer or well-rotted compost into the soil to provide a strong foundation of nutrients. Once the plants have become established, top dress the soil with a balanced fertilizer every 4-6 weeks during the growing season. Follow the manufacturer’s instructions for application rates and methods.
Organic Fertilizer Options
If you prefer organic gardening methods, there are several organic fertilizer options suitable for feeding globe artichokes. Composted manure, fish emulsion, seaweed extract, and bone meal are all excellent choices. These organic fertilizers provide a slow and steady release of nutrients while improving soil fertility and structure.

Pest and Disease Control
Like any other plant, globe artichokes are susceptible to certain pests and diseases. However, by being vigilant, implementing preventive measures, and promptly addressing any issues, you can minimize the risk and keep your plants healthy.
Common Pests
Aphids, slugs, snails, and caterpillars are common pests that can affect globe artichoke plants. Regularly scout your plants for signs of pests, such as distorted leaves or chewed foliage. If an infestation occurs, consider using organic pest control methods, such as insecticidal soaps, neem oil, or introducing beneficial insects like ladybugs.
Common Diseases
Globe artichokes can be susceptible to fungal diseases, such as powdery mildew, rust, and gray mold. Ensure proper air circulation by spacing the plants adequately and avoiding overhead watering. If diseases are detected, promptly remove affected leaves or plants and apply appropriate organic fungicides, such as copper-based sprays or sulfur-based treatments.
Preventive Measures
To prevent pest and disease issues, practice good garden hygiene and sanitation. Remove plant debris and fallen leaves, as they can harbor pests and diseases. Regularly inspect the plants for any signs of trouble and promptly take appropriate actions. Additionally, companion planting with pest-repelling plants, such as marigolds or garlic, can help deter pests.
Harvesting Globe Artichoke
The ultimate reward for your hard work is harvesting the delicious artichoke buds. By determining the appropriate harvest time, properly harvesting the buds, and understanding secondary harvests, you can enjoy the fruits of your labor to the fullest.
Determining Harvest Time
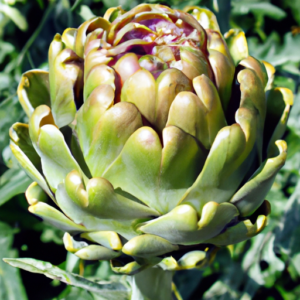
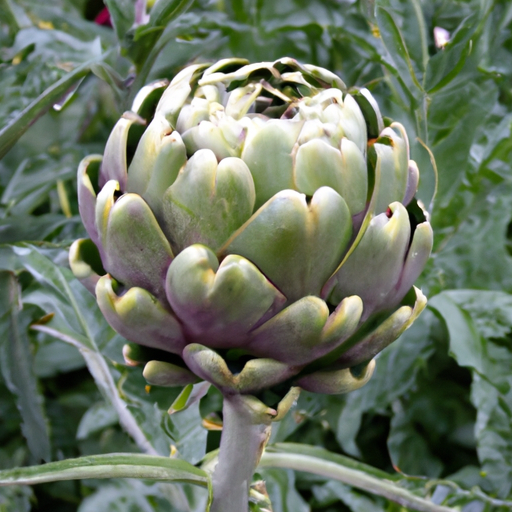
Globe artichokes are ready to be harvested when the buds have reached a desirable size but have not yet opened. The buds should feel firm and have tight, compact scales. Harvesting too early may result in smaller buds, while harvesting too late may lead to tough or woody artichokes.
Harvesting the Buds
To harvest the artichoke buds, use a sharp knife or pruners to cut the stem just below the base of the bud. Leave a short portion of the stem attached to the bud, typically around 1-2 inches. This will help the artichokes stay fresh and makes them easier to handle during preparation.
Secondary Harvests
After the main bud has been harvested, globe artichoke plants often produce secondary or lateral buds. These smaller buds can be harvested by cutting them individually as they reach a suitable size. Regularly monitor the plants for the development of secondary buds, as they can provide an extended harvest period and maximize your yield.
In conclusion, growing globe artichokes requires careful consideration of sunlight requirements, soil conditions, and climate considerations. By preparing the soil, selecting the appropriate propagation method, planting correctly, providing proper support, and following the necessary care practices, you can enjoy a bountiful harvest of globe artichokes. With patience and dedication, you will have the pleasure of savoring the unique flavor and texture of this delightful vegetable in your own backyard. Happy gardening!


