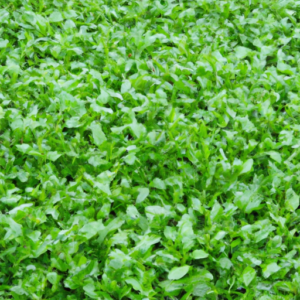
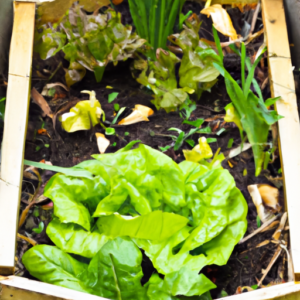
Imagine having fresh, vibrant watercress right at your fingertips, ready to enhance your salads and soups. In this article, you’ll discover the secrets to successfully growing watercress in your own backyard. From finding the perfect location to nurturing its growth, we’ll guide you through every step of the process. Whether you’re a seasoned gardener or a newbie, get ready to unlock the wonders of growing your very own watercress garden.

Choosing a Watercress Variety
When it comes to choosing a watercress variety, there are a few factors to consider. First and foremost, you should think about the growing conditions in your area. Watercress thrives in cool, moist environments, so if you live in a hot and dry region, you may need to explore alternative options. Additionally, you should select a variety that is suitable for your climate. Some varieties are more resistant to heat or cold, so take into account the average temperatures in your area throughout the year. Lastly, consider the taste and texture of the watercress. Different varieties may have slightly different flavors and levels of spiciness, so choose one that aligns with your preferences.
Preparing the Growing Area
Before you can start growing watercress, you need to prepare the growing area properly. Begin by selecting a suitable location that receives partial shade. Watercress prefers indirect sunlight to avoid scorching the delicate leaves. Once you’ve chosen the spot, it’s important to prepare the soil. Watercress thrives in loamy soil that is rich in organic matter. Amend the soil by adding compost or well-rotted manure to provide the necessary nutrients. Another essential aspect of preparing the growing area is ensuring adequate drainage. Watercress requires consistently moist soil, but excess water should be able to drain away to prevent waterlogging.
Starting from Seeds
One way to grow watercress is by starting from seeds. To ensure successful germination, source high-quality watercress seeds from a reputable supplier. Starting the seeds indoors is recommended, as it allows for better control over the growing conditions. Sow the seeds on a shallow tray filled with seed starting mix, gently pressing them into the soil. Keep the tray indoors in a warm and well-lit area, ensuring the soil remains consistently moist. Once the seedlings have grown a few inches tall, they can be transplanted outdoors.

Starting from Cuttings
Another option for growing watercress is starting from cuttings. Select healthy watercress plants from which to take your cuttings. Look for plants that have vibrant green leaves and no signs of disease or pests. Choose suitable stems for cuttings by selecting ones that are relatively thick and have a good amount of foliage. Remove the lower leaves from the stems, leaving only a few at the tip. Place the stems in a container of water, ensuring that the water covers at least a few inches of the stem. Allow the cuttings to root in the water for about a week before planting them in the soil.
Planting and Watering
When it’s time to plant your watercress seedlings or rooted cuttings, make sure to prepare the soil properly. Clear any weeds or debris from the planting area and loosen the soil with a garden fork or tiller. If you’re planting in containers, use a well-draining potting mix. Space the plants about 4 to 6 inches apart to allow for their spreading growth habit. After planting, water the watercress thoroughly to settle the soil around the roots. As watercress requires consistently moist soil, it’s important to water regularly, especially during dry spells or hot weather, to keep the soil consistently moist.
Providing the Right Growing Conditions
To ensure the optimal growth of your watercress plants, it’s essential to provide the right growing conditions. Adequate sunlight is crucial for watercress, but it’s important to strike a balance. While watercress needs some exposure to sunlight, direct sunlight and excessive heat can cause the leaves to wilt or scorch. Partial shade is the ideal environment for watercress to thrive. Additionally, maintaining optimal temperature and humidity levels is important. Watercress grows best in temperatures ranging from 50°F to 75°F (10°C to 24°C) and requires high humidity. In colder climates, consider using supplemental lighting or setting up a greenhouse to provide the necessary warmth and moisture.
Fertilizing and Mulching
Proper fertilizing and mulching practices can significantly contribute to the growth and health of your watercress plants. Choose a balanced fertilizer, preferably one that is rich in nitrogen, to provide the necessary nutrients for vigorous growth. Apply the fertilizer according to the manufacturer’s instructions, usually every few weeks during the growing season. Mulching around the plants can help retain moisture and suppress weed growth. Use organic mulch, such as straw or wood chips, to create a protective layer over the soil. This will help conserve moisture, deter weed growth, and provide some insulation to the roots.
Managing Pests and Diseases
To keep your watercress plants healthy, it’s important to regularly inspect them for pests. Common pests that may affect watercress include aphids, caterpillars, and snails. If you notice any signs of pest infestation, such as chewed leaves or sticky residue, take action promptly. Use organic pest control methods, such as introducing beneficial insects or applying natural insecticides. Good hygiene practices, such as removing fallen leaves and debris, can also help prevent diseases. Additionally, proper watering techniques, such as avoiding overhead watering, can reduce the risk of fungal diseases that thrive in moist conditions.
Harvesting
Harvesting watercress is a rewarding part of the growing process. Wait until the watercress reaches maturity before harvesting. The leaves should be dark green and have a crisp texture. To harvest, cut the stems just above the soil line, using a sharp pair of garden shears or scissors. Make sure to leave some leaves attached to the stem to allow for regrowth. Harvesting only the upper portion of the plant allows the remaining leaves to continue growing. By practicing selective harvesting, you can enjoy a continuous supply of fresh watercress throughout the growing season.
Storing and Using Watercress
After harvesting watercress, it’s important to store it correctly to maintain its freshness and quality. Start by rinsing the watercress thoroughly to remove any dirt or debris. Shake off excess water and gently pat dry with a clean towel or paper towels. To extend its shelf life, store the watercress in a perforated plastic bag or airtight container. Place it in the refrigerator’s crisper drawer to keep it cool and crisp. Stored properly, watercress will typically stay fresh for up to a week. Use watercress in various culinary applications, such as salads, sandwiches, soups, or stir-fries, to enjoy its unique peppery flavor and nutritional benefits.
In conclusion, growing watercress can be a rewarding experience. By considering the growing conditions, preparing the growing area, starting from seeds or cuttings, providing the right growing conditions, fertilizing and mulching, managing pests and diseases, and following proper harvesting and storage practices, you can successfully grow and enjoy this versatile and nutritious plant. With a little care and attention, you can have a fresh supply of watercress right at your fingertips. Happy watercress growing!


